Dollar Tree DIY: Mason Jar Succulent Planters
Spring has officially sprung and had me itching to start putting more springtime accents and colors around our farmhouse. I decided Mason jar succulent planters were the perfect way to help bring in spring while keeping the cozy feeling of our farmhouse.
There are so many things you can do with these succulent planters once they are made! These ones will be getting put around the farmhouse, but they would also be a great Mother’s Day gift.
If you are looking for a craft that the kids can help with, I would highly recommend this one! I love home décor that I can use in multiple ways and places throughout my house.
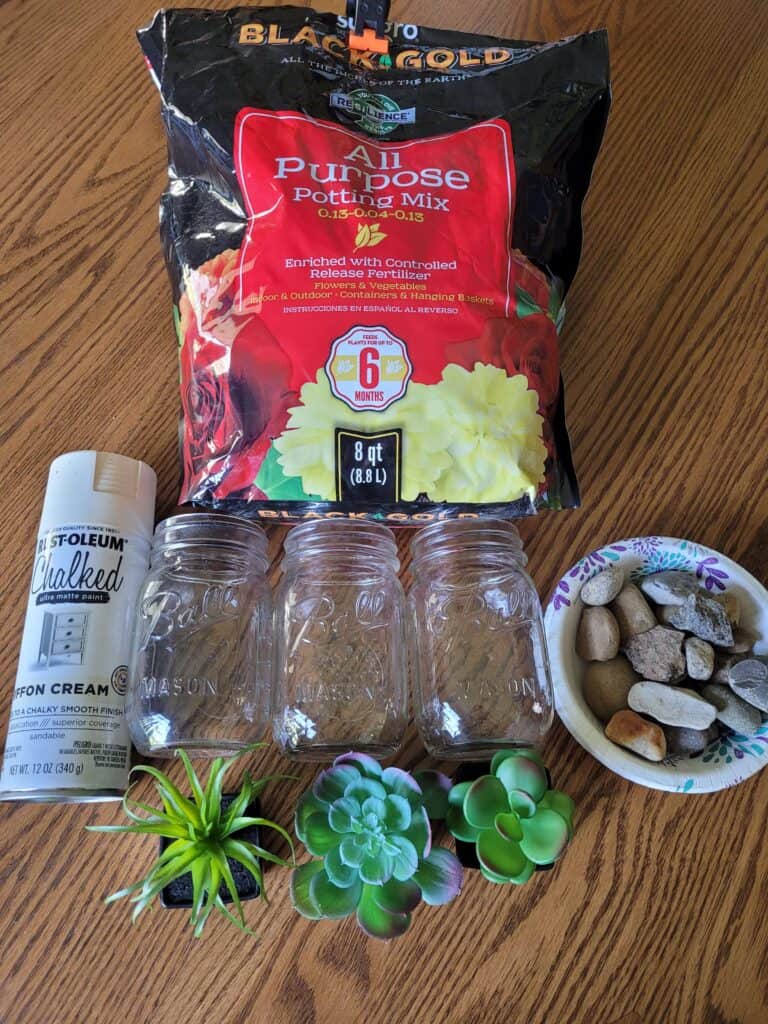
While I love all the fun home décor stores, I would rather see what I can create for a much smaller price tag. Everything to make these succulent planters was found at Dollar Tree or were things I already had around my home.
Supplies Needed:
- Mason Jars/Glass Canning Jars
- Artificial Succulent Plants
- River Rocks/River Pebbles
- Potting Soil
- Rubbing alcohol
- Rust-oleum Chalked Spray Paint
Pro Tip: I happened to have the chalk spray paint on hand. If you don’t have chalk paint on hand, I will share a simple solution to make your own below. You will also need a paint brush if you make your own.
Steps to Make Your Springtime Mason Jar Succulent Planters
Step 1: Round up your supplies
As you gather up or shop for your supplies, one of the key pieces to this DIY project is the chalk paint. If you do not have some handy, you can make your own with this neat hack.
Bonus DIY: Make Your Own Chalk Paint
To make chalk paint, you will need baby powder made from talc (not cornstarch) and acrylic paint (which dollar stores sell).
For every tablespoon of talc powder mix in 2 tablespoons of acrylic paint. That’s it. You are ready to go!
Free Workshop – Join our free Simplify Money Workshop
The *only* way to save money is to spend less than you earn. That means you need to decrease your expenses or increase your income.
We want to help you do both.
Join our FREE Simplify Money Workshop to learn the fundamentals of growing wealth. Because when you can spend less than you earn, your money has no choice but to grow. You will build your savings and pay down debt.
What’s more? We’ve got a bunch of free money-hacks to share with you:
- Hacks to lower your monthly bills
- Hacks to spend less on debt
- Hacks to start investing
- Hacks to increase your income by $20/month (with no extra effort)
This workshop has everything you need to accomplish the cardinal rule of personal finance: keep your income over your expenses.
Join our free 5-day Simplify Money Workshop, and start growing your wealth today.
Step 2: Prepare Your Canning Jars
Paint, especially chalk paint, does not play well with dusty jars. If your canning jars have been sitting around, you will want to wash and dry them. You can skip the washing if you purchased your canning jars at the store, but you will need to do this with all jars: Wipe them with the rubbing alcohol to get them ready for the paint. Once the alcohol dries, you are ready to start painting.
Step 3: Paint Your Mason Jars
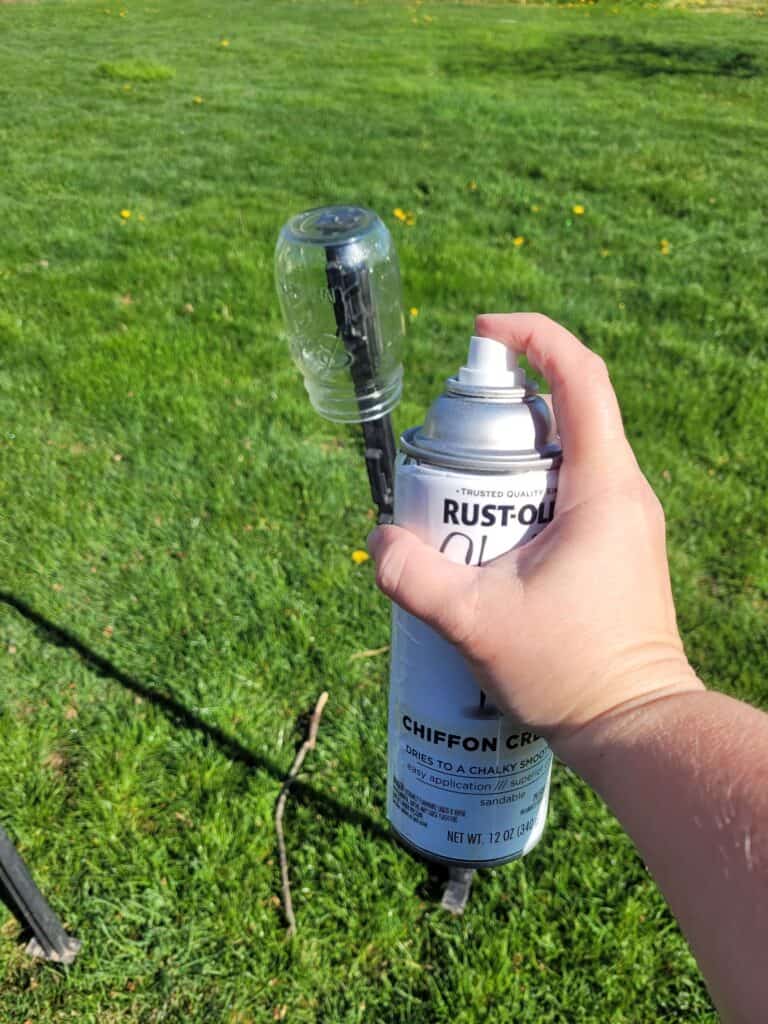
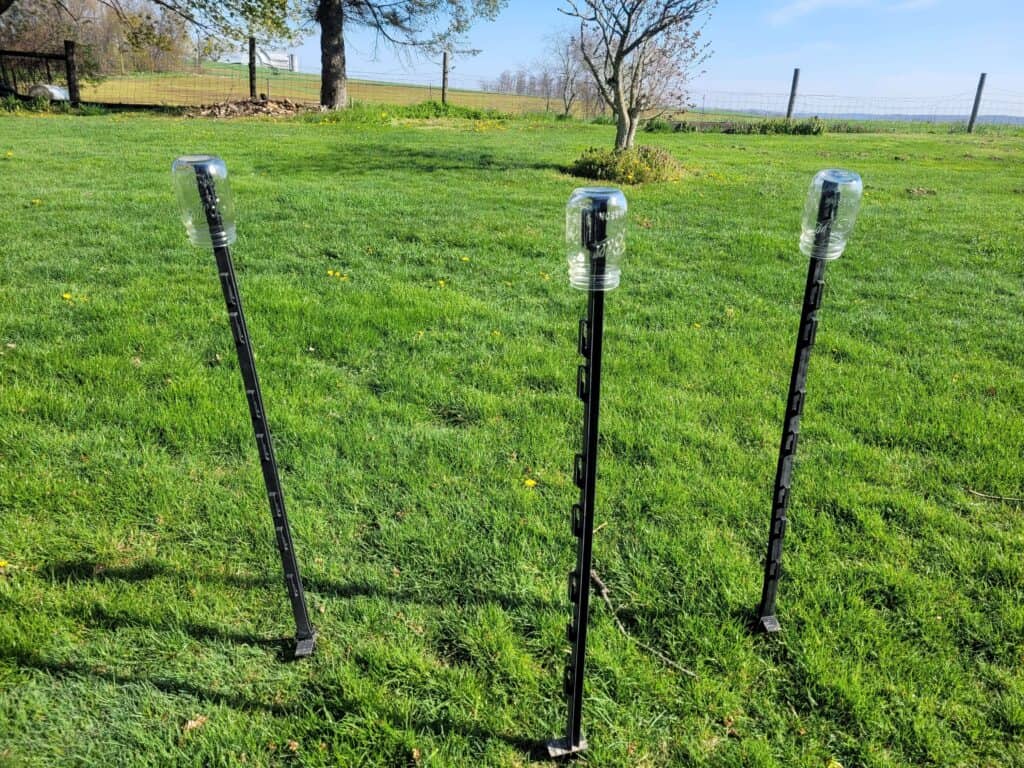
To get the coverage I wanted with the spray paint, I stuck my jars on top of electric fence posts in my yard (did I mention I live on a farm?). You could also use any kind of stick that will support the weight of your jars. This method allowed me the ability to paint the bottom, too.
The posts made the spray painting much easier, but if you make your own paint, you can apply it with a paint brush. Just place your canning jar on top of a paper plate or some old newspapers to keep your tabletop free of paint.
Once I had them painted to my liking, I left them hanging on the fence posts for an hour or two to dry out in the sunlight. After a few hours of drying, examine the jars to see if there are any places that need to be touched up. It is much easier to do touch-ups now while there is nothing in them. I only did one coat on mine because I wanted more of a rustic look. You might want two or three coats. Remember, it is what you like.
- Related: 10 Things to Buy at Dollar Stores
Step 4: Fill Your Jars with River Rocks
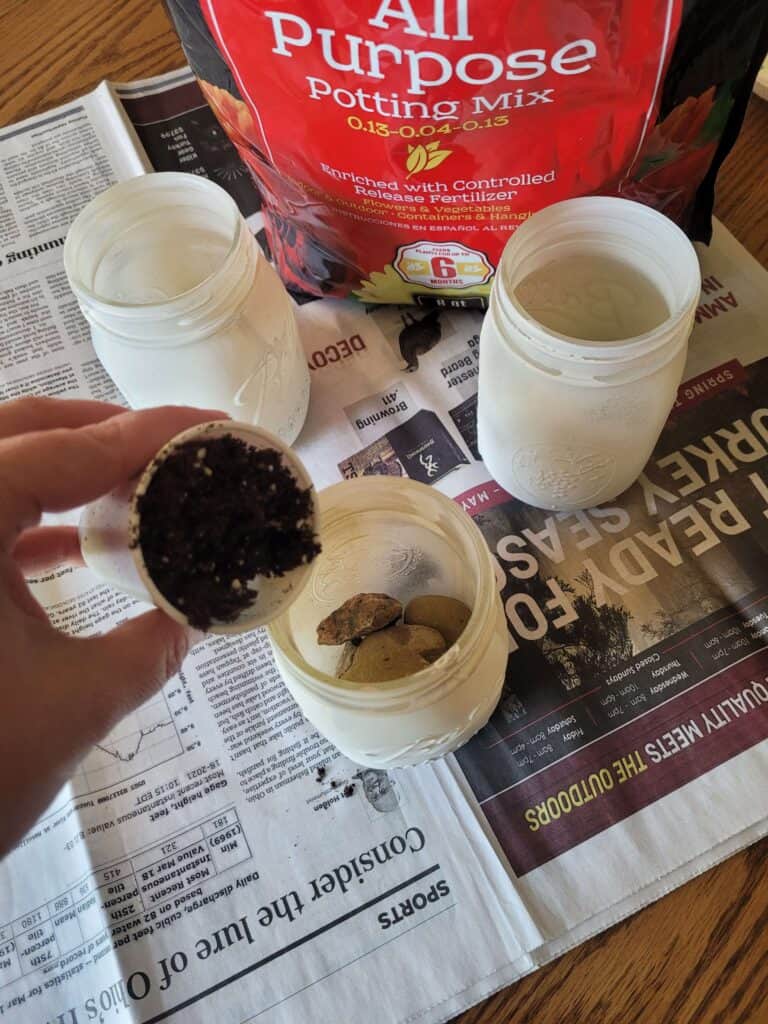
Now that the mason jars are dry, fill them a quarter to halfway full of river rock. The size of your river rocks or pebbles does not matter. We happened to have a pile of rocks at our house because we have been landscaping. I just used what we already had on hand. You can use any stones you happen to find around your house or Dollar Tree has different small bags of rocks that work, too.
By putting some river rock in the bottom of the jar, it gives the jar a little weight so it cannot be tipped over as easily. Another reason for the river rock is if you would ever want to convert the Mason jars to hold real succulents instead of fake succulents, you already have a drainage system in place. The rocks allow the water to drain from the soil so your plants are not sitting in a pool of water.
Step 5: Fill Your Jars with Soil
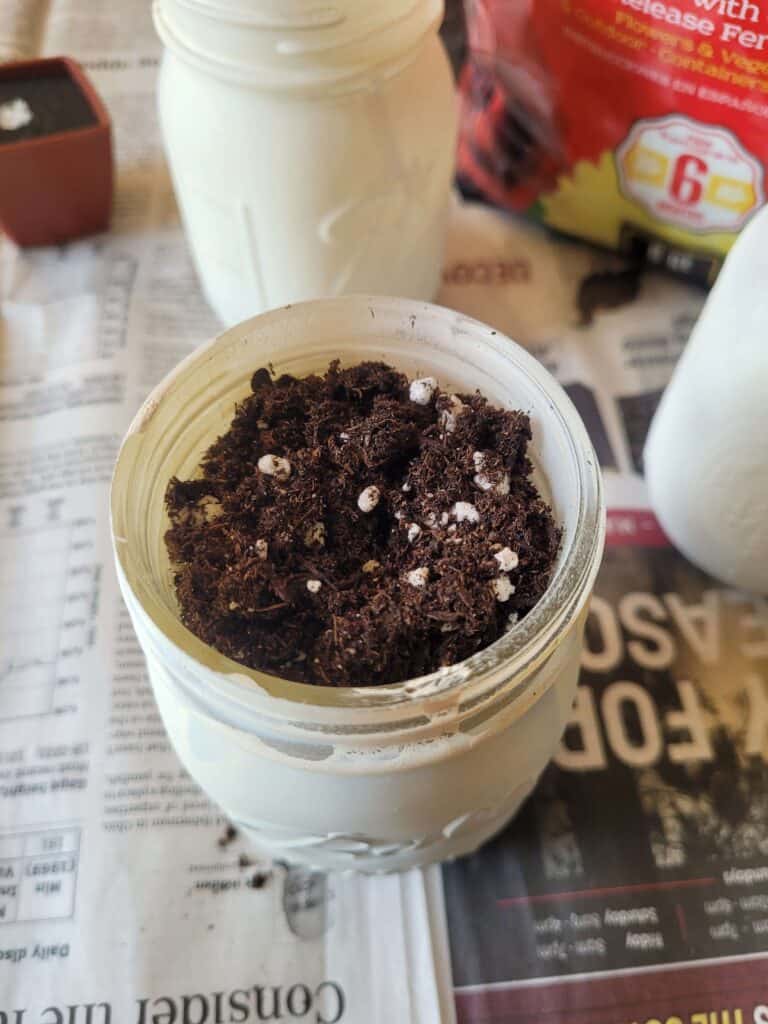
Now that the river rock is in, fill the rest of the jar to the bottom of the lip with potting soil. I like the look of potting soil because it makes the planter look more alive than filling it with any type of plastic foam. Also, by using potting soil, it makes for an easy switch down the line should you want to replace the dollar store succulents with live plants.
Step 6: Add Your Dollar Store Succulents
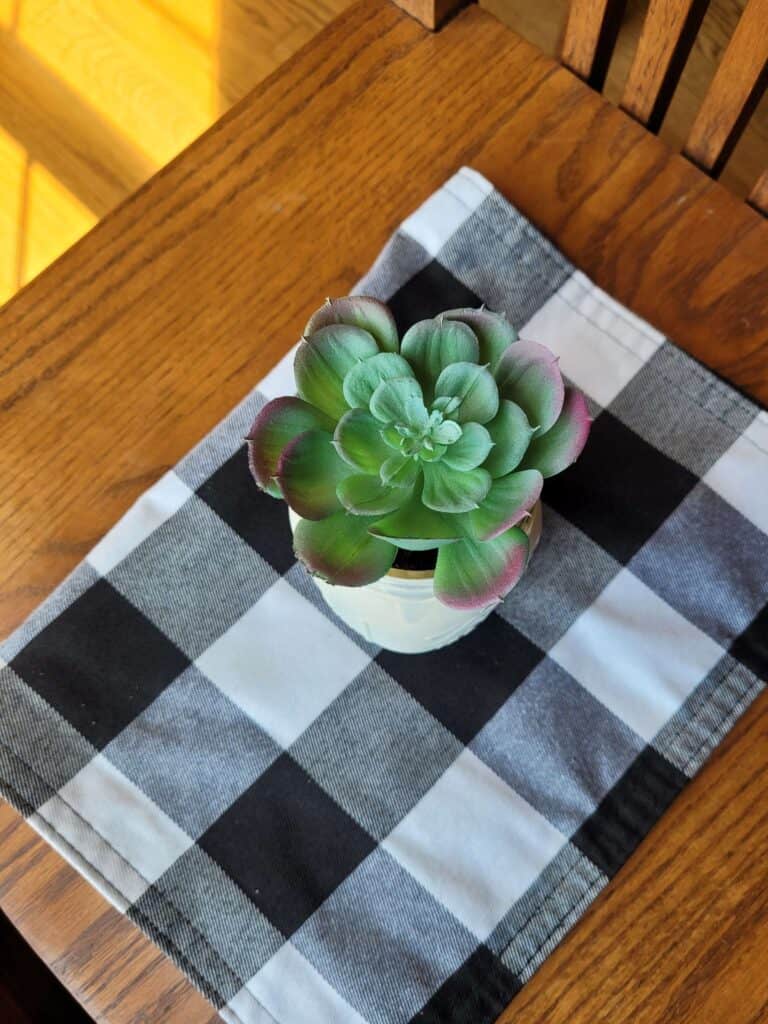
With a few easy twists, the plastic succulents will come loose from the plastic foam packaging they come in. Once the succulents are out, go ahead and place them in the potting soil. I prefer the normal mouth mason jars instead of the wide mouth jars, as I feel like they hold the succulents in place better.
Step 7: Proudly Display Your Creation
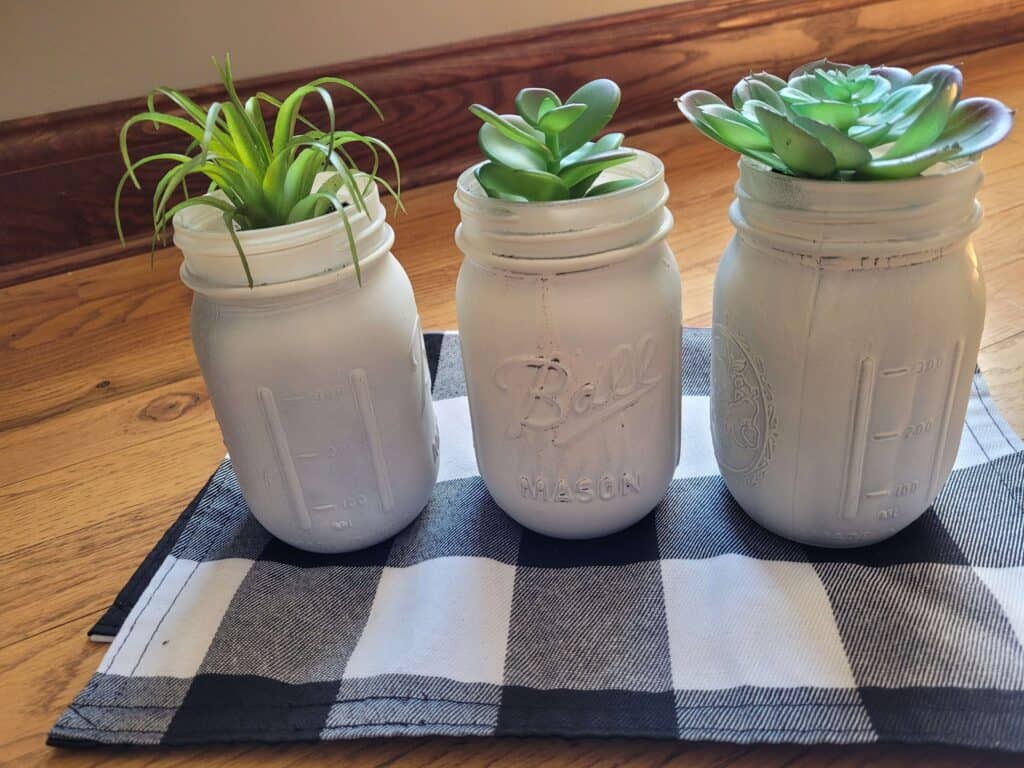
Only one final thing to do: Find a cute place in your home to place your beautiful creations, or give them as a gift to someone special to brighten their day and their home.
Looking for more Dollar Tree DIYs? Here’s 20+ of our favorite!
Want more life hacks? Check these out…
- 7 Tips to Make Your Home Look Expensive (on a budget)
- Dealing with Stress? 7 Habits of People Who Are Always Stress-Free
- If You are Living on One Income, Here’s 43 Frugal Hacks to Help
- 7 Hacks to Make You a Better Grocery Shopper
Need help saving money? Read these next…
- Follow These 7 Habits of Women Who Always Have Money
- Stop Buying These 9 Things So You Can Save Money
- When You Destroy Debt, You Get to Keep More of Your Money
Want to save these tips for later? Click here to pin this post!
Be sure to follow us on Pinterest for more money-saving life hacks!
About the author Lauren Croskey
Lauren Croskey lives with her husband and children in Ohio's Amish Country. When she's not helping companies with social media or running, Lauren freelances for Wooster Media Group.