Dollar Tree DIY Home Decor: Tiered Tray
As the weather gets warmer, my mind can’t help but drift to all the wonderful activities that summer brings.
The summer months are a popular time for graduations, graduation parties, bridal showers, baby showers, weddings, and cookouts.
For those hosting any of these events, this is a great way to go if you don’t have serving trays already.
Everything to make this tiered tray can be found at the Dollar Tree.
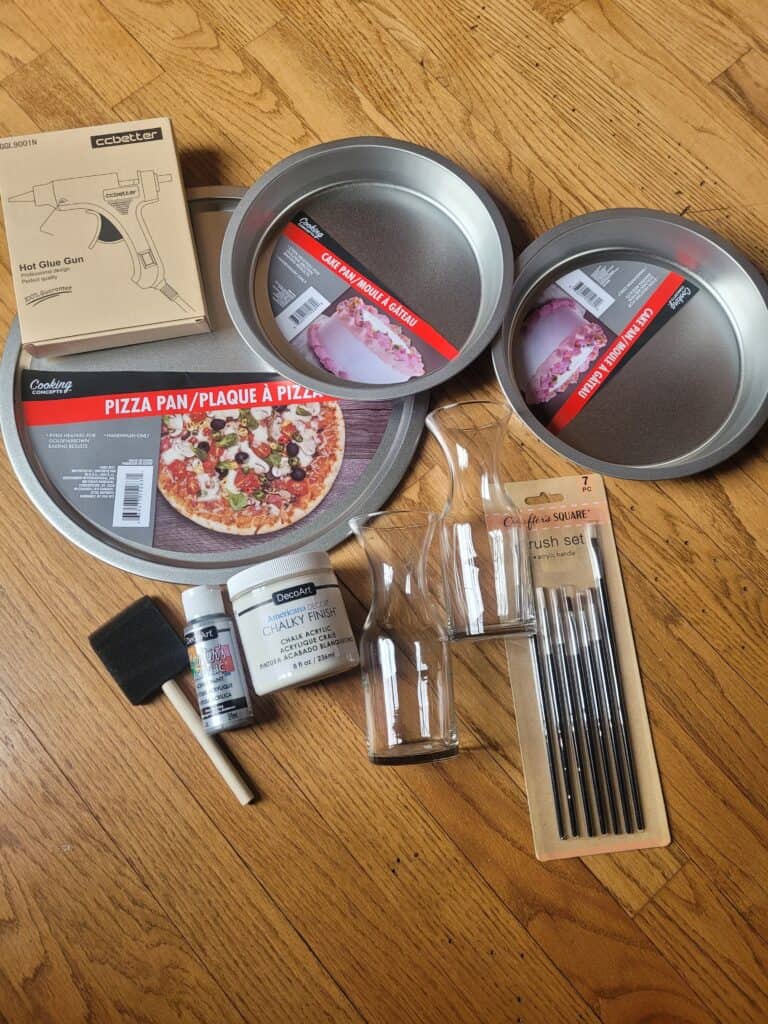
Supplies Needed:
- Pizza Pan
- 2 Cake Pans
- 2 Glass Candlestick Holders or any type of small glass (just make sure both ends are flat)
- Hot Glue Gun or Super Glue
- Chalk Paint
- Sponge Brush
- Fine Paint Brush
- Dark Acrylic Paint
Pro Tip: I happened to have chalk paint on hand. If you don’t have any on hand and the Dollar Tree is sold out, I’ll share a simple solution to make your own in the directions below.
Steps to Make Your Own Tiered Tray
This tiered tray can be used in so many ways throughout the year. Did I mention how much I love things that are versatile? My tiered tray is currently sitting as the centerpiece on my farmhouse table, but I have big plans for it this summer. I foresee it being used to hold all the goodies for s’mores and many other yummy treats as well. Let’s begin!
Step 1: Round up your supplies
As you gather up or shop for your supplies, one of the key pieces to this DIY project is the chalk paint.
If you do not have some handy, you can make your own with this neat hack.
Make Your Own Chalk Paint
To make chalk paint, you will need baby powder made from talc (not cornstarch) and acrylic paint (which dollar stores sell).
For every tablespoon of talc powder mix in 2 tablespoons of acrylic paint. That’s it. You are ready to go!
- Related: 11 DIY Dollar Tree Home Decor Crafts
Step 2: Prep the Site You Are Painting On
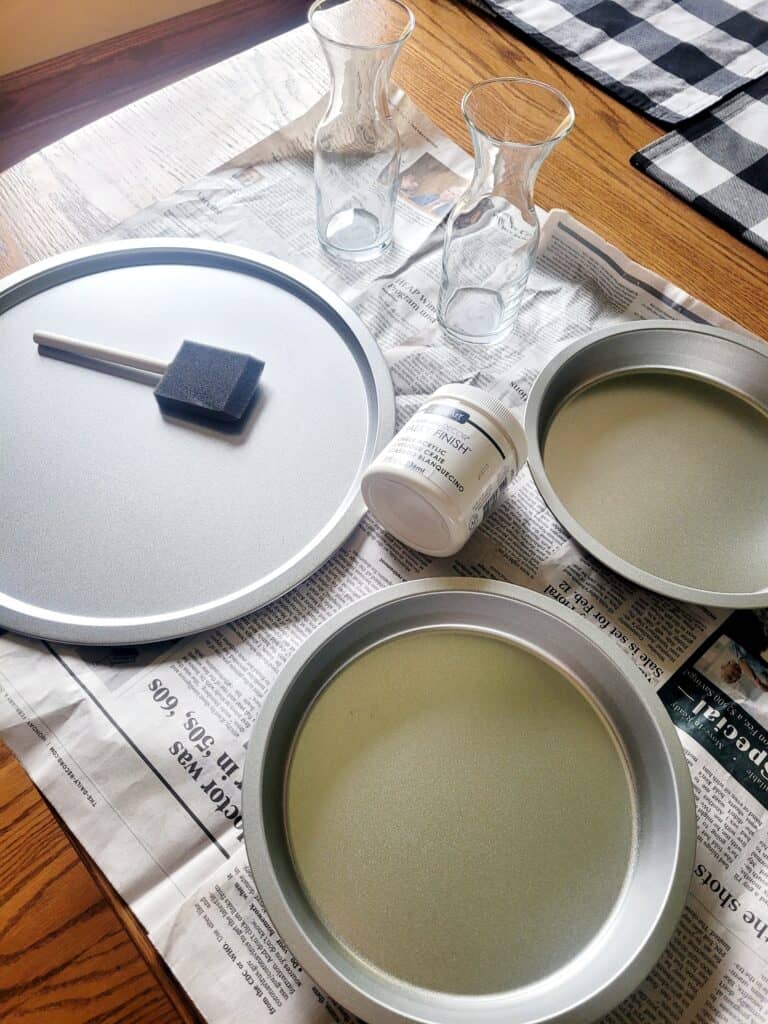
Wherever you decide to paint, make sure you protect it from the paint. So, prep your site to avoid any mishaps. I laid down some pages from an old newspaper on my table to protect it from the paint. Once you prep your site, set out everything that will need to be painted — the pizza pan, cake pans, and candlestick holders/glass holders.
Free Workshop – Join our free Simplify Money Workshop
The *only* way to save money is to spend less than you earn. That means you need to decrease your expenses or increase your income.
We want to help you do both.
Join our FREE Simplify Money Workshop to learn the fundamentals of growing wealth. Because when you can spend less than you earn, your money has no choice but to grow. You will build your savings and pay down debt.
What’s more? We’ve got a bunch of free money-hacks to share with you:
- Hacks to lower your monthly bills
- Hacks to spend less on debt
- Hacks to start investing
- Hacks to increase your income by $20/month (with no extra effort)
This workshop has everything you need to accomplish the cardinal rule of personal finance: keep your income over your expenses.
Join our free 5-day Simplify Money Workshop, and start growing your wealth today.
Step 3: Paint Your Pans and Glass Holders
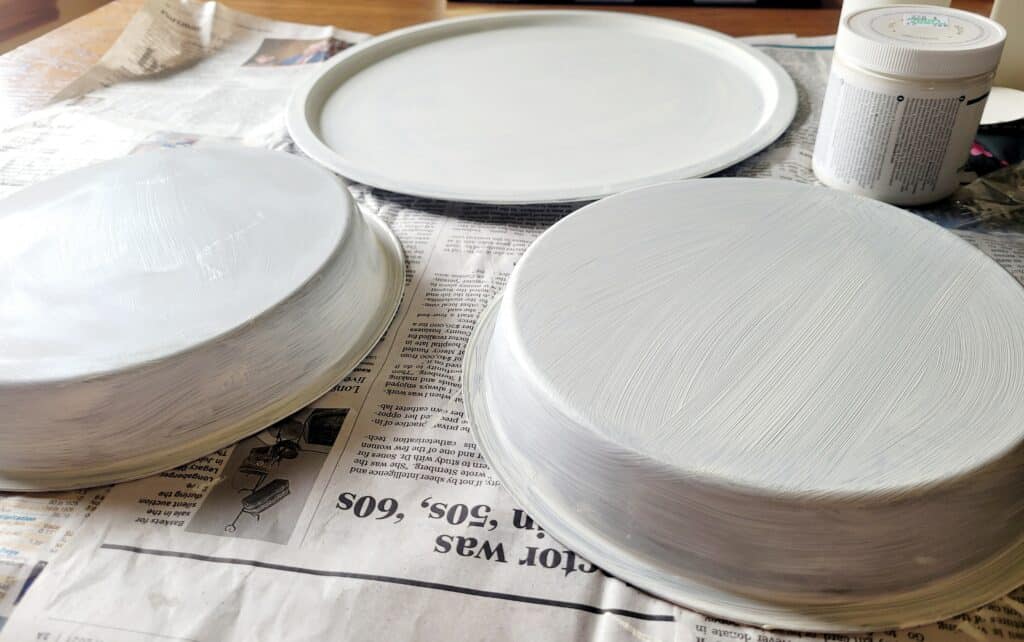
Now the fun happens! You will paint each side of the pans. In order to do this right, you have to be patient. Each side of the pans will need at least 2 to 3 coats of paint.
Paint the top sides of the pizza pan, cake pans, and both glass holders. Let dry for at least an hour. I tried to do a second coat before the hour was up and ran into issues, so be patient with this project. You will be glad you did.
Pro Tip: In between coats, I put my sponge brush in a zippered plastic bag to keep it from drying out.
Once the first coat has dried after an hour, do a second coat on everything. After the second coat, I waited a few hours to make sure everything was completely dry before I attempted the bottom sides.
When I came back to start the bottom sides of the cake pans, I noticed that the glass holders still weren’t as covered as I wanted them to be, so I did a third coat on the glass holders.
Once I finished the third coat on the holders, I flipped the cake pans over and painted the bottom and sides of them. Just like I did the other side, I painted, waited an hour, and gave them a second coat as well. After all of the sides were painted, I let everything sit overnight.
- Related: 5 Ways to Stop Worrying About Money
Step 4: Measure & Find The Middle
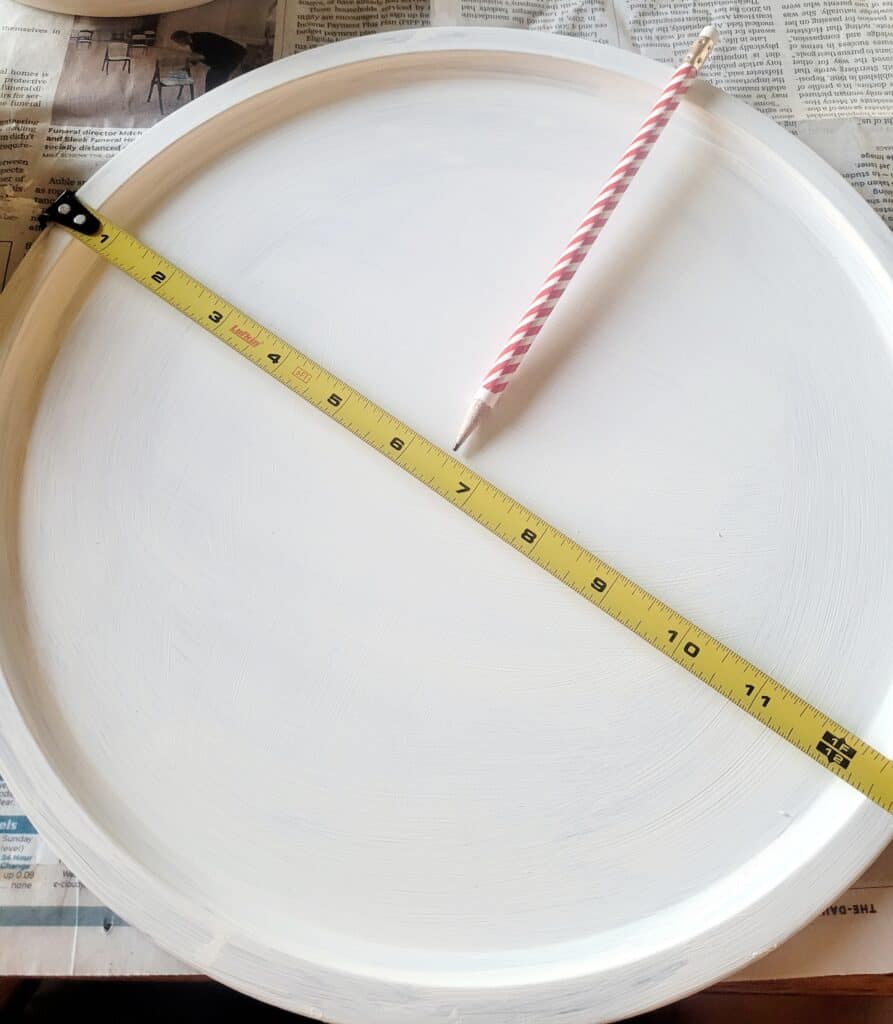
After the painted pans sat overnight, it was time to put everything together. Before I glued anything together permanently, I made sure to measure and find the middle of all the pans. By doing this, you know exactly where you are going to glue the pieces together and that everything will line up and not look off-centered.
I used a pencil and my son’s tiny measuring tape to do this. Once I found the center, I marked it with my pencil, and then set the glass holder on to make sure all sides had the same amount of distance on each side.
Step 5: Glue Everything Together
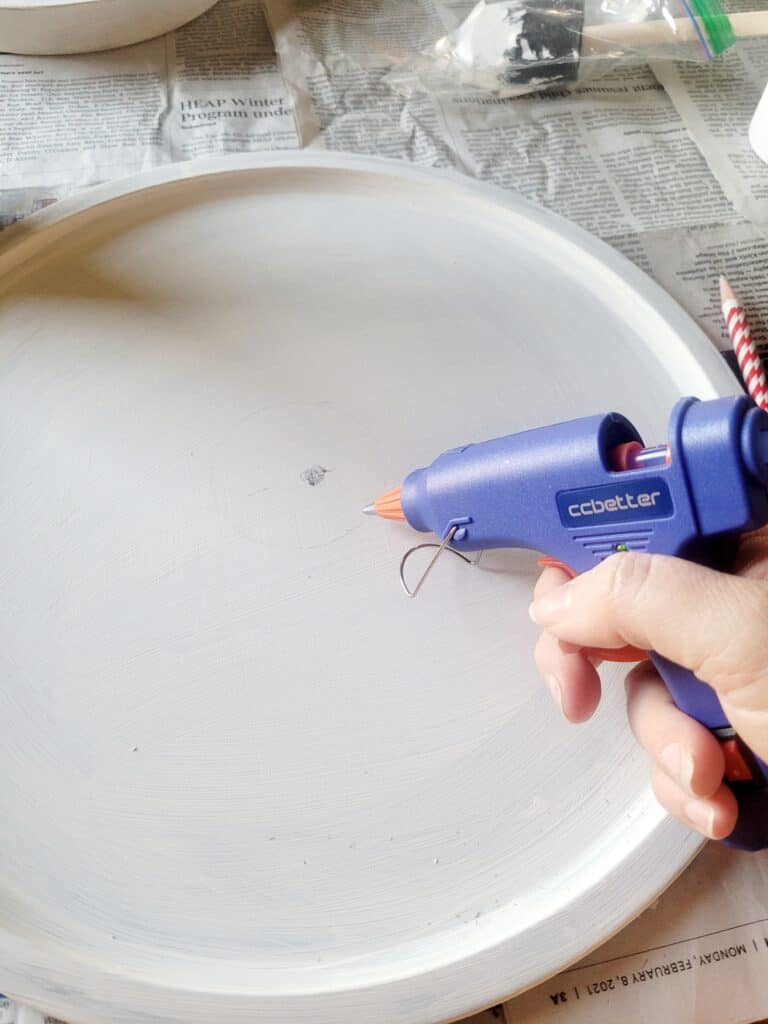
Once you have marked where you are going to glue, it’s time to bust out that glue! I used my hot glue gun, but you could also use super glue.
Pro Tip: My suggestion would be if you just want a temporary decoration and aren’t sure where you are going to store it, use a hot glue gun. If you are planning on using the tray a lot and have space to store it built, use super glue for a more permanent hold.
I started on the bottom and worked my way up. I ran glue around the circle I had penciled onto the pizza pan and stuck my glass holder on top of the glue ring. Once set on the glue, apply light pressure and hold for a minute to make sure it sets.
Next, I applied a ring of hot glue to the top of my glass holder and used the circle I drew on the bottom of the cake pan as my guide to set the pan onto the glass holder. Repeat this process until finished.
Once everything has been glued together, set something with a decent amount of weight on top to apply light pressure while it dries completely.
- Related: 20+ Best Dollar Tree DIY Crafts
Step 6: Add Distressed Accents

When you feel everything is in place and dry, take a flat tip, small paintbrush, and dry brush a dark accent color around the edges. This technique is called dry brushing.
Dry brushing is where you dip the tip of your brush in paint, remove some of the paint on a scrap piece of paper, and then lightly do brush strokes around the edges to give it a distressed look. You never wet the brush. Just keep repeating until finished. The nice part about this step is you can’t mess it up! Add as much or as little distressing as you want!
Let the paint dry once finished.
Step 7: Display Your Beautiful Dollar Store DIY Tiered Tray
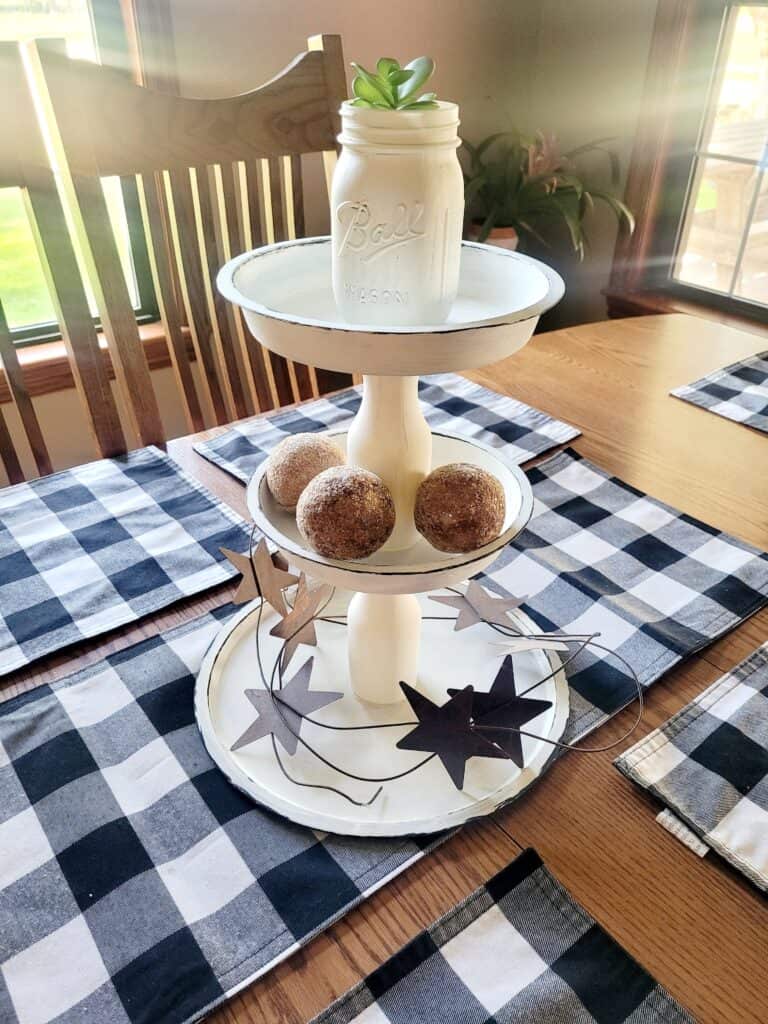
It’s time to show off your tiered tray! Find a cute place around your home and add accents to it or buy some yummy goodies and fill it with those.
I decided to display the Dollar Tree DIY Mason Jar Succulent Planter I made earlier. It was such a perfect fit.
Enjoy your tiered tray and let us know how it worked out for you!
Save more money! Read these next…
- 7 Hacks to Make Your Home Look Expensive on the Cheap
- The Top 9 Essential Dave Ramsey Tips for 2022
- Before You Shop Amazon, Learn These Ultimate Hacks to Save Hundreds!
- Follow These 9 Frugal Tips to Live Below Your Means
Save at your favorite stores:
- These are the 10 Things to Buy at Dollar Stores (and 5 Things to Avoid)
- Learn These 7 Hacks Before You Shop at Trader Joe’s
- Here are 6 Ways to Save Even More at Walmart
Want to save these tips for later? Click here to pin this post!
Be sure to follow us on Pinterest for more money-saving life hacks!

About the author Lauren Croskey
Lauren Croskey lives with her husband and children in Ohio's Amish Country. When she's not helping companies with social media or running, Lauren freelances for Wooster Media Group.