Fun DIY Christmas Countdown Plate
Having little ones means Christmas is always a magical time around our house. From getting out all the Christmas decorations, making cookies, going to look at houses beautifully decorated in lights, attending all the holiday gatherings, to waiting eagerly for that jolly old elf to arrive on Christmas Eve after bedtime, our kids love everything about Christmas.
We have many Christmas traditions, but one of their favorites is counting down the days until Christmas. There is nothing they love more than a good countdown to something special. This craft makes for a great addition to your holiday decor by its simplistic look — but also gives your children something to look forward to, as well.
Ready to start the countdown? Let’s go.
Free Workshop – Join our free Simplify Money Workshop
The *only* way to save money is to spend less than you earn. That means you need to decrease your expenses or increase your income.
We want to help you do both.
Join our FREE Simplify Money Workshop to learn the fundamentals of growing wealth. Because when you can spend less than you earn, your money has no choice but to grow. You will build your savings and pay down debt.
What’s more? We’ve got a bunch of free money-hacks to share with you:
- Hacks to lower your monthly bills
- Hacks to spend less on debt
- Hacks to start investing
- Hacks to increase your income by $20/month (with no extra effort)
This workshop has everything you need to accomplish the cardinal rule of personal finance: keep your income over your expenses.
Join our free 5-day Simplify Money Workshop, and start growing your wealth today.
Supplies Needed:
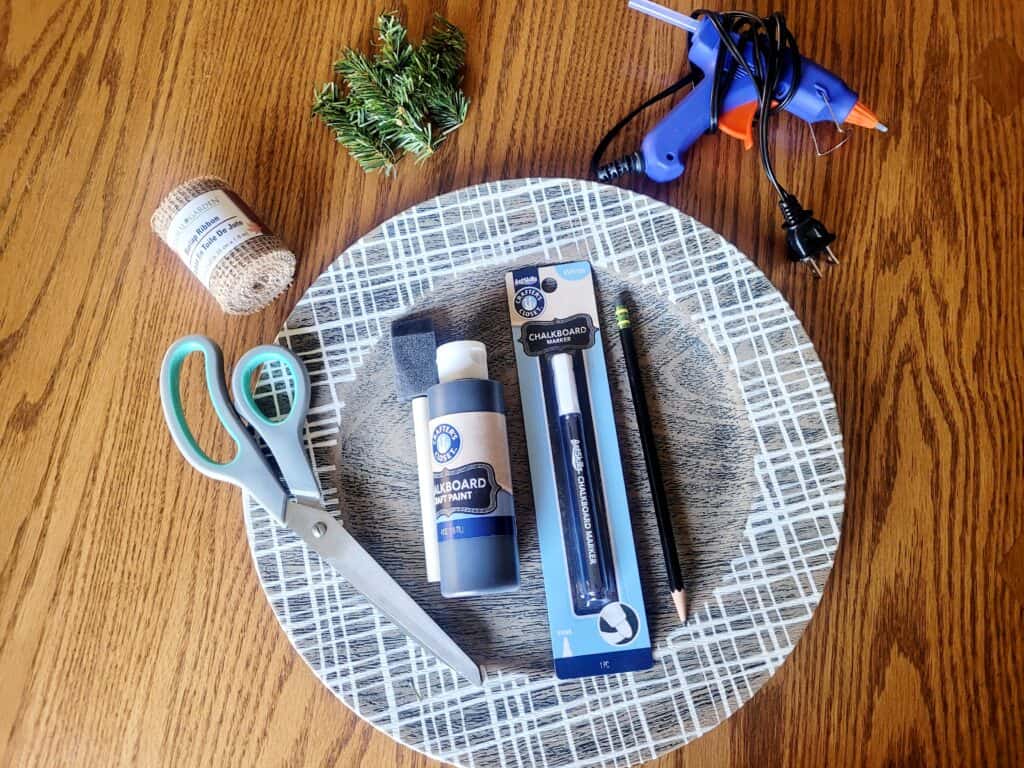
- Plate (Go to the seasonal aisles to look, I found mine in with the Thanksgiving decorations)
- Black Chalkboard Paint
- White Chalkboard Marker
- Pencil
- Sponge/Foam Paint Brush
- Scissors
- Greenery
- Burlap Ribbon
- Hot Glue Gun
Steps To Create Your Countdown to Christmas Plate
You will love the simplicity of this one. It has a nice, clean style and can be reimagined for any event where you want to build anticipation and excitement.
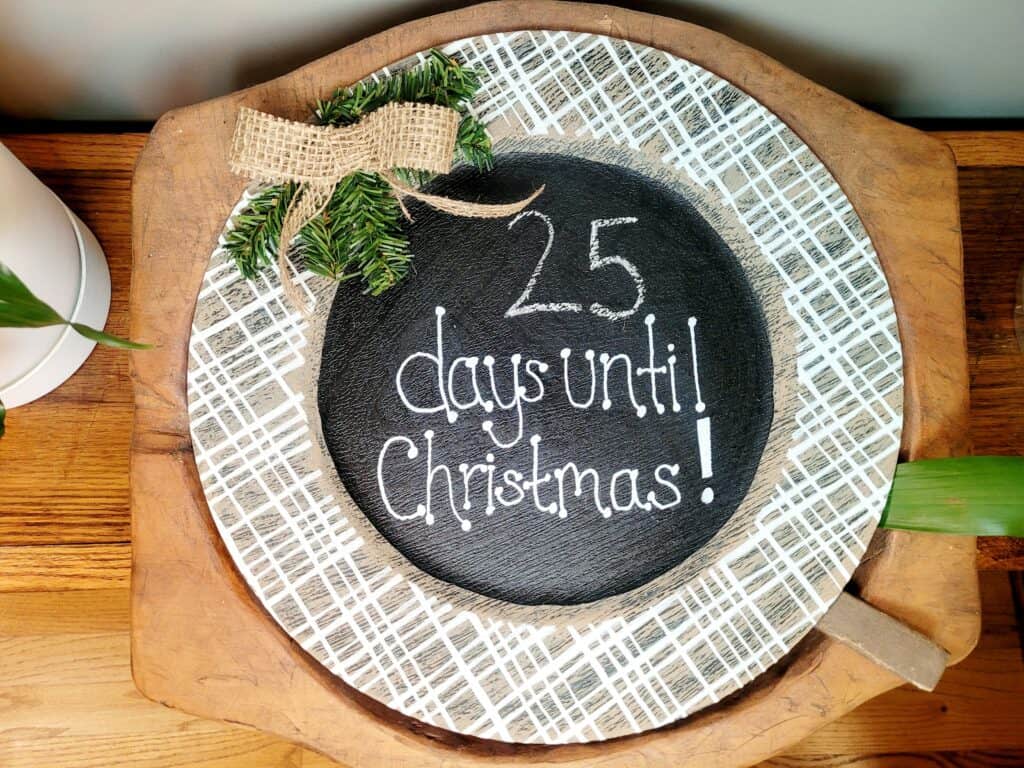
1. Paint the Center of the Plate
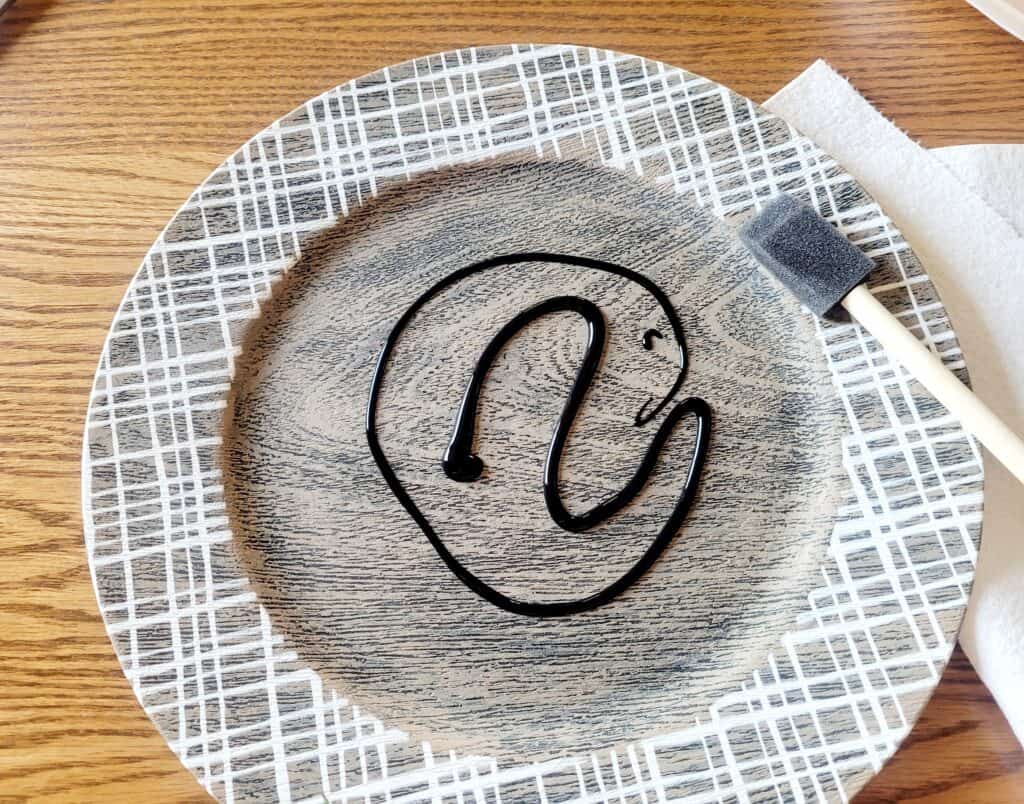
When painting the center of my plate, I just put the paint directly onto the plate and then spread it out from there using my sponge brush.
The next time I do this craft, I will use a little less paint because it covered the plate better than I thought it would. After I put the paint on the plate, I brushed outwards until I got to where I was wanting the paint to end.
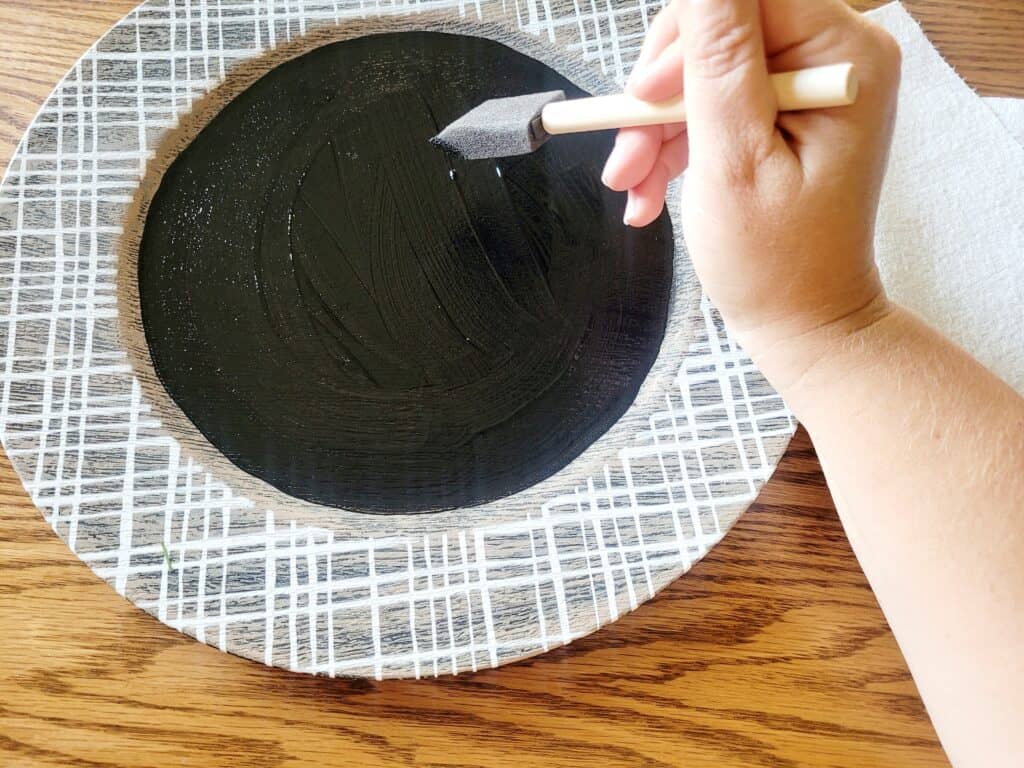
Then, I turned the sponge brush so that it would be at an angle and painted an outline around the inner circle of the plate. Once the inner circle was painted, I used the rest of the paint on my plate to fill in the center.
You want the plate well-covered, but try to remove any extra paint so the center area is smooth. To do this, I grabbed a plastic foam plate so I could wipe excess paint I brushed off the Christmas countdown plate. I dabbed the sponge brush onto the plate to pick up the extra paint. After the center on the plate was painted, I let it dry for 24 hours. I wanted it completely dry. Your patience will be rewarded.
2. Plan Where Your Words Will Go
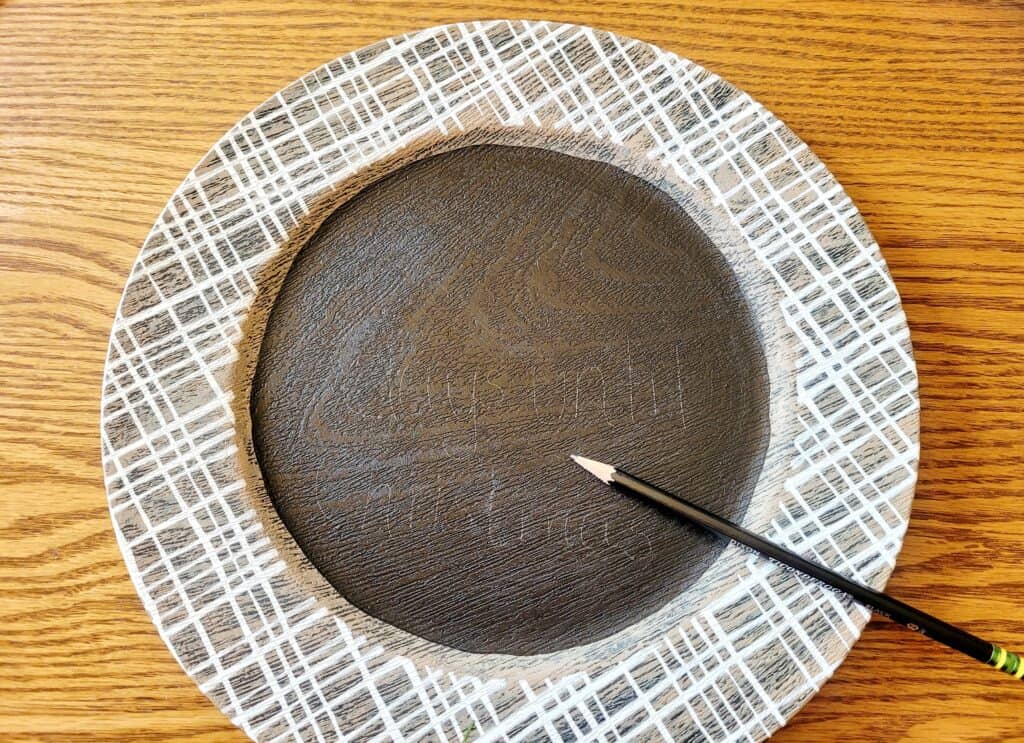
Once the chalkboard paint was dry, it was time to plan out where I wanted to put the words “Days Until Christmas.” I left enough room at the top so that my children could use regular chalk to write the actual number of days until Christmas. This is something they will be able to do easily.
I chose to start my words around the middle of my plate. Just like an artist will sketch a scene before painting it, I used a pencil so that I could lightly write where I wanted the words. After I painted the words onto the plate, no one would notice the pencil markings I used as a guide.
You can print the words, do half print and half cursive, or choose whatever suits your style best as far as lettering goes!
- Related: 20+ Best Dollar Tree DIY Crafts
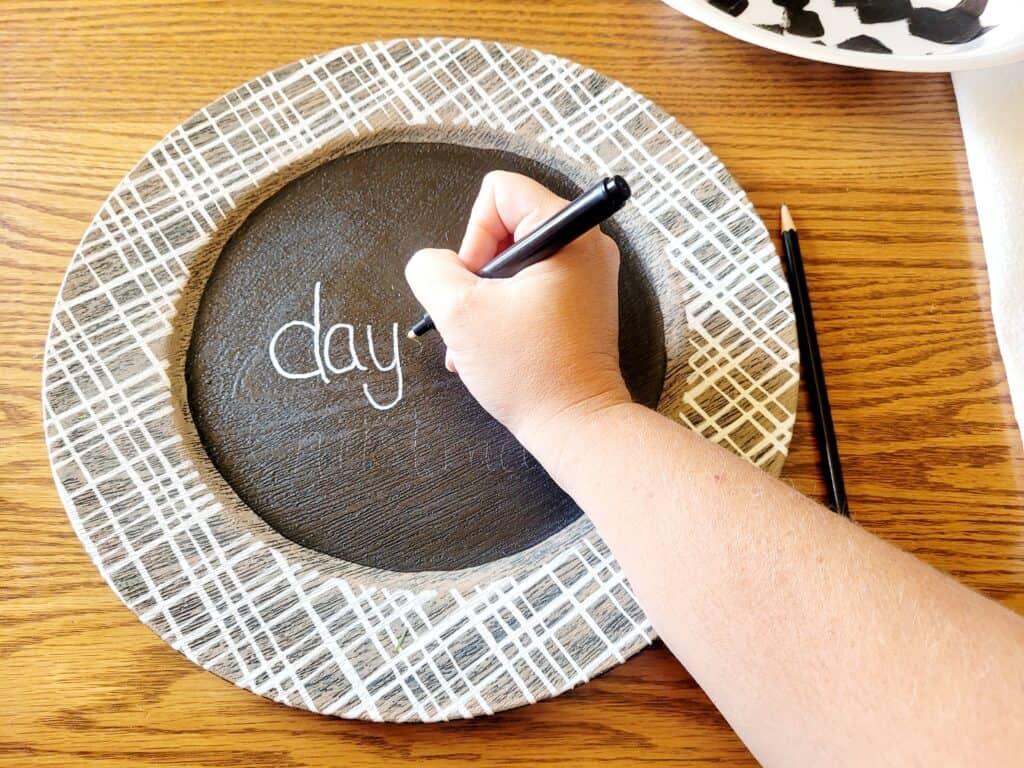
3. Add Your Fun Lettering!
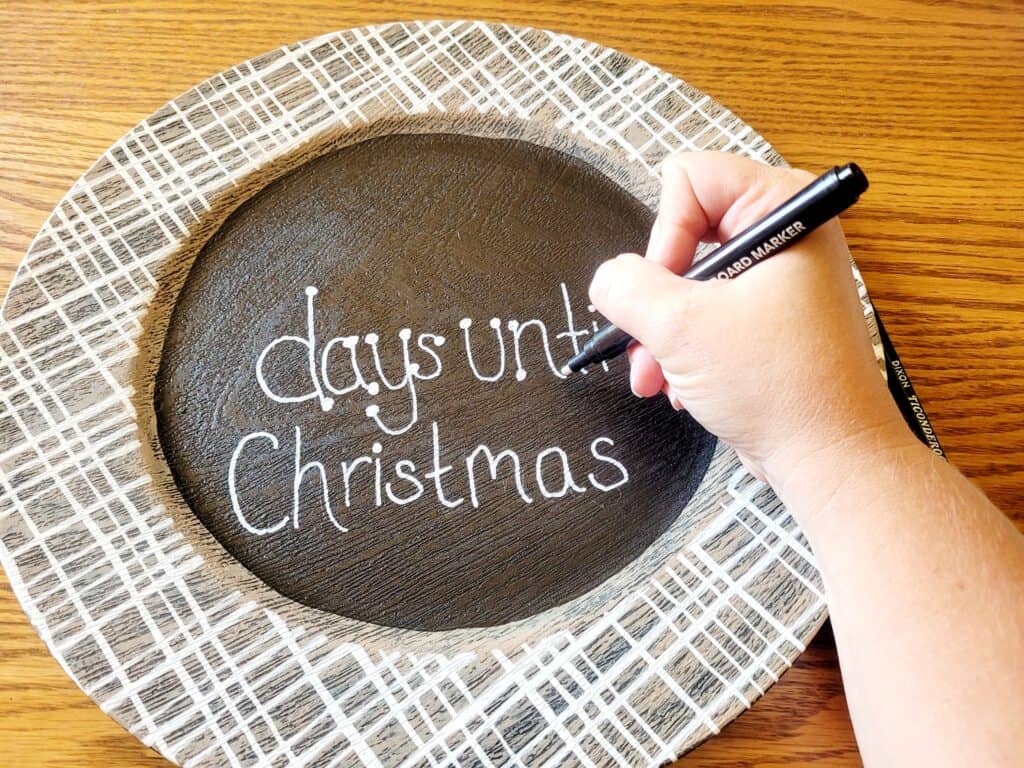
Now that everything is planned and written out with a pencil, it is time to use the white chalk marker! Carefully, go over the writing you did in pencil with the chalk marker. I wrote out the words with the marker and then came back through to add my decorative dots on each letter. For my dots, I just made small circles at the points of every letter and filled them in.
4. Attach Greenery and Burlap Accents

Being the thrifty person that I am and, well, a huge lover of Christmas decorations, I decided to save money on greenery. Instead of going to a craft store to purchase artificial greenery, I snipped some pieces off of one of my old Christmas wreaths.
If you have Christmas or other holiday decorations, think about ways you can repurpose them for crafts like this one. I believe I snipped off and used about 6 strands that were each around 2” long. Remember, it does not have to be exact, and you can use as little or as much as you like.
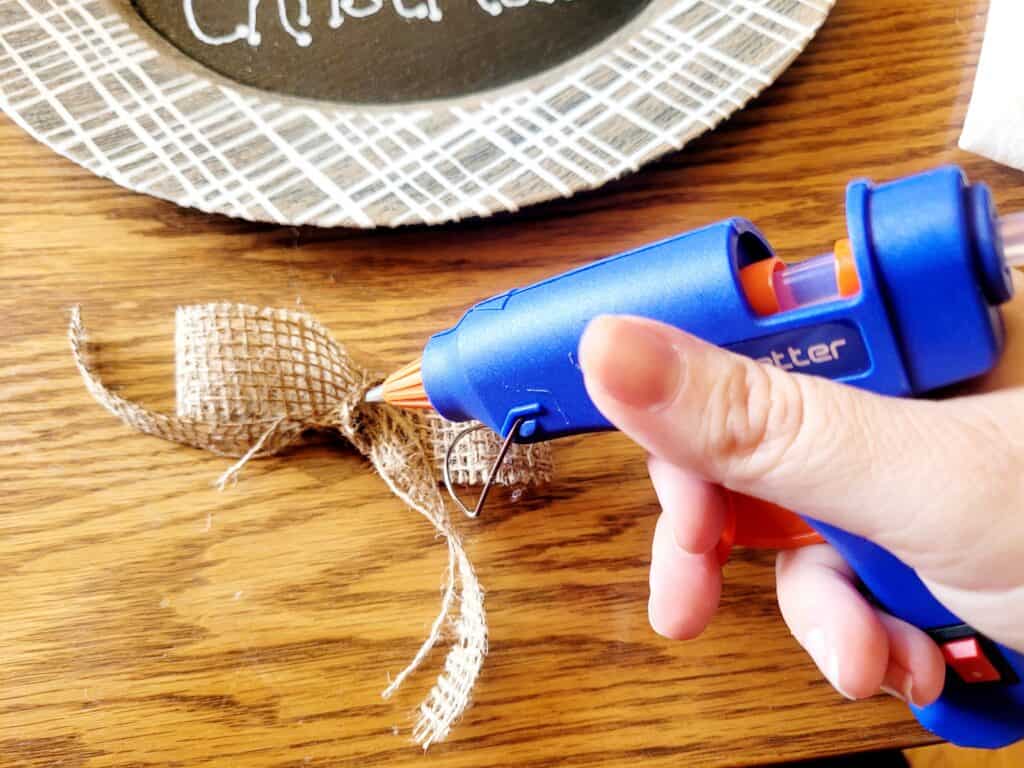
Once I had my pieces, I used my hot glue gun to attach them to my plate. I started with the end pieces fanned out and then worked my way in from there. Once I had the greenery glued, I took an extra roll of burlap that I had from when we made the fall wreath to make a bow. After I tied the bow, I put a large dot of hot glue on the back of the ribbon and then placed it onto the greenery where I thought it would look best.
5. Add Your Countdown Christmas Plate to Your Holiday Decor
With this being a piece the kids will change each day, I didn’t want to hang it anywhere. As Christmas gets closer in our household, ours will most likely be placed on a bookcase shelf and propped up against something. This will allow the kids to access it easily.
Another option would be to use a plate stand. I hope your family enjoys counting down to Christmas with this plate as much as I know our children will!
Want More DIY Ideas?
- DIY Mason Jar Succulent Planter
- Eliminate Clutter With This Drawer Organization Hack
- Versatile DIY Tiered Tray a Great Home Decor Addition
Save more money! Read these next…
- The 9 Essential Dave Ramsey Tips You Need to Know Right Now
- Here are 6 Habits of People Who Never Overspend
- Living on a Single Income? Here are 11 Ways to Save Money
Save at your favorite stores:
- Before You Shop HomeGoods, Read These 7 Hacks
- Check Out These 7 Whole Foods Hacks
- The 9 Aldi Hacks That Will Save You Cash
Want to save these tips for later? Click here to pin this post!
Be sure to follow us on Pinterest for more money-saving life hacks!
About the author Lauren Croskey
Lauren Croskey lives with her husband and children in Ohio's Amish Country. When she's not helping companies with social media or running, Lauren freelances for Wooster Media Group.